
Digitize DVD/Folder/ISO to over 500 formats at lightning speed.
Free Download Free DownloadHow to Rip a Homemade DVD with HandBrake?
Are DVDs still popular nowadays? Because of the growth of streaming services, the decline of DVDs has been witnessed in the past few years. However, we can still confirm that DVD ripping is in great demand. On the one hand, many people still prefer physical DVD collecting. On the other hand, some people may store abundant hard copies to manage. Hence, DVD ripping can better deal with these problems.
To do it, ripping DVDs with HandBrake can be a great tool. So, if you don’t know how to use HandBrake to rip the DVD, you’ve come to the right place. Keep following our passage and carefully read the instructions below.

Guide List
Part 1. How to Rip DVD with HandBrake?
Before introducing the steps, we should first know some basic information about the HandBrake. HandBrake is a cross-platform program for DVD ripping and movie converting. Its primary function is to process common multimedia files and any DVD or Blu-ray that doesn’t include copy protections. Besides, HandBrake supports various video and audio encoders to convert your DVD to MP4, MP3, and other file formats.
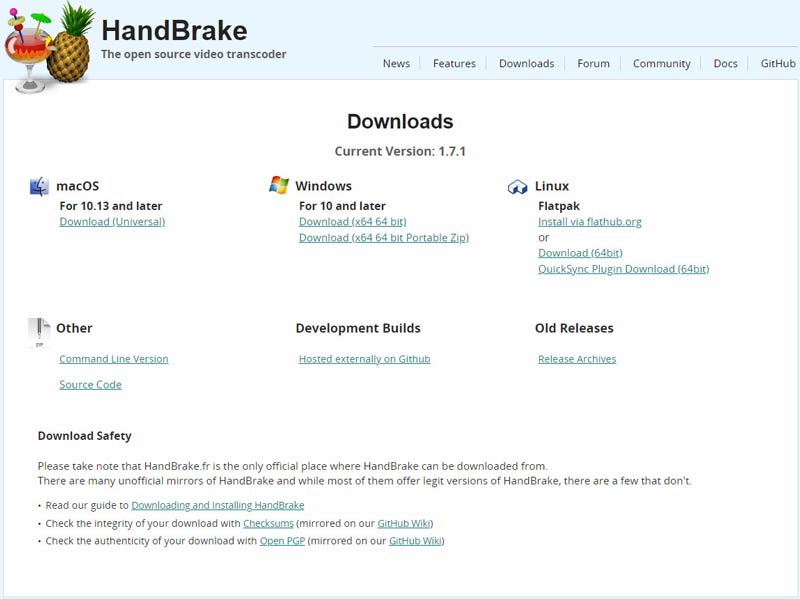
Step 1Preparation – Download and Install HandBrake
As for preparation, go to HanBrake’s official site and get a free download of this ripper. The current version, 1.7.1, is available for Mac (macOS 10.13 and later) and Windows (10 and later). You can find more versions for other platforms too, on the download page.
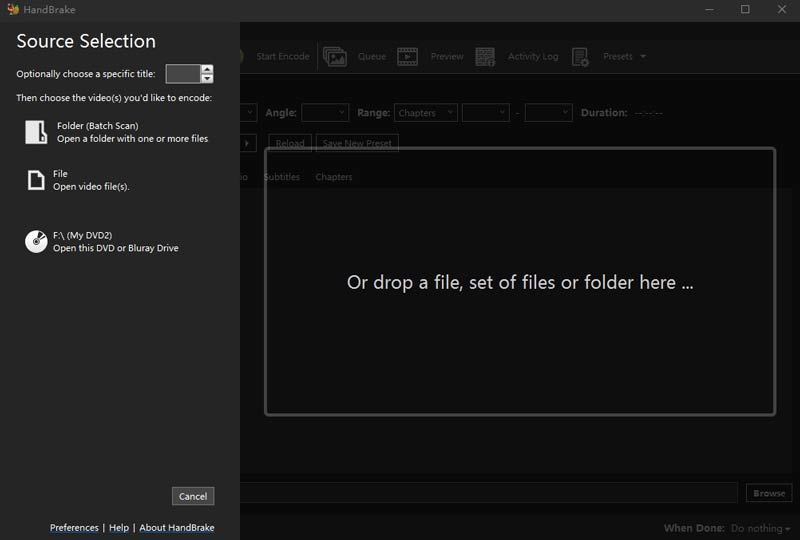
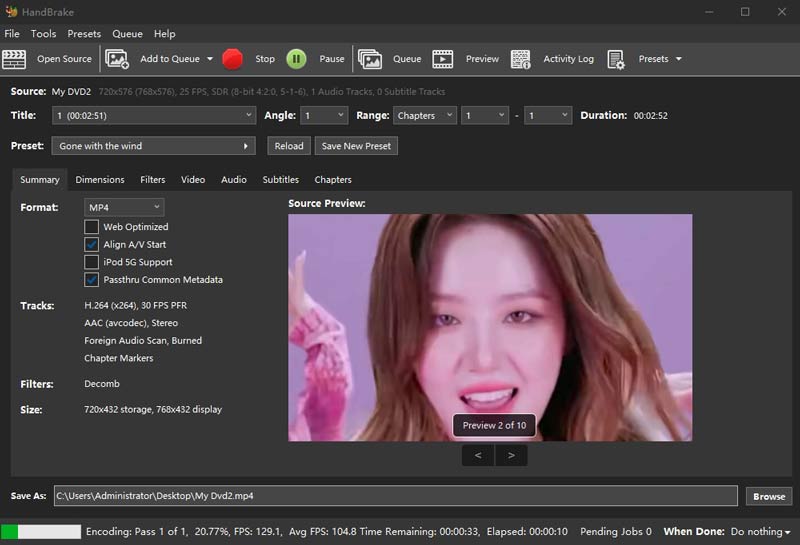
Step 2Load and Rip the DVD with HandBrake
When the download is finished, insert your target DVD into your computer’s DVD drive. Open HandBrake and you can see your target DVD in Source Selection. That means it is detected. Click your target DVD so that HandBrake will start to scan it. Moreover, the scanning time depends on the content of your DVD.
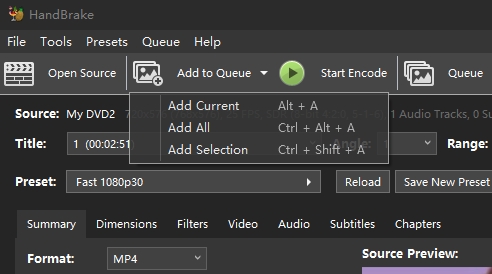
Step 3Select the Title or Chapter You Want to Rip
HandBrake will automatically select a title for you. Or you can choose by clicking Add to Queue on the top menu. Add Current means adding the currently selected title. Add All is about adding all DVD titles at the same time. Add Selection will pop up a new window for specifying your title.
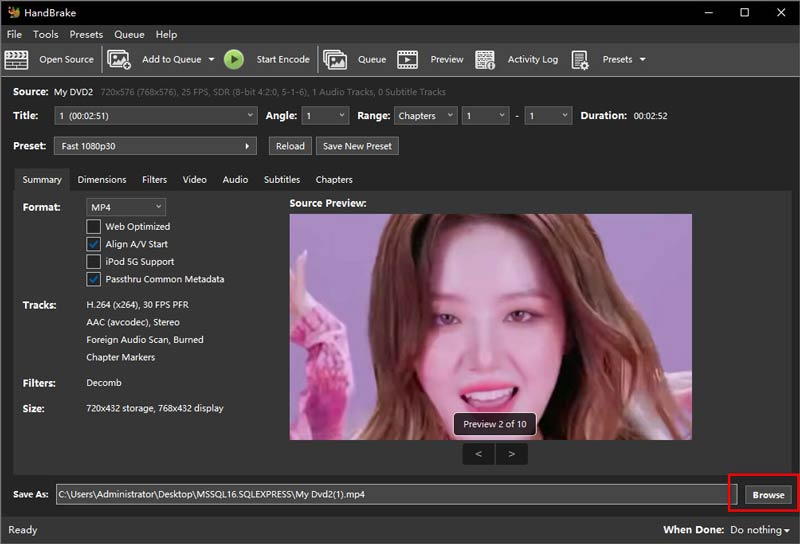
Step 4Select the Output Format
Click the Format drop-down option, where you can select from MP4, WebM, and MKV. Besides, you can customize your DVD videos based on the seven major aspects. They are Custom Presets, General, Web, Devices, Matroska, Hardware, Production.

Step 5Select the Storing Destination
On the bottom of the interface, you can see Save As. Click Browse to choose the final destination you want to put your file in. HandBrake can help you store the resulting file in hardware and external devices.
Step 6Select the Output Format
After you finish all the steps, it’s time to rip the DVD with HandBrake. Click Start Queue on the head of the interface. Then, you will see a progress bar along the bottom, telling you how much time it’s about to spend. You can double-click on it to watch your video. The rip is done!
Part 2. HandBrake DVD Ripping Issue
As a free transcoder, HandBrake, indeed, has excellent performances in ripping Blu-ray and DVDs. However, it still needs to be improved. Damaged DVDs, overloaded CPU, obsolete hardware, and copy protection will cause various problems to HandBrake.
1. HandBrake does not convert entire DVD with copy protections;
2. Converting speed is low;
3. Halfway crash or encoding stop often happen;
4. Output quality is poor;
5. Encrypted DVD support of HandBrake will be unavailable.
As a result, these made HandBrake seem to be unstable or inefficient.
Part 3. Rip DVD Efficiently with an Alternative DVD Ripper
Solving the above problems may be hard. Therefore, we highly recommend a comprehensive alternative to you, DVD Ripper, chosen by Blu-ray Software. This one tends to be more stable, completely ripping all the DVD content. You will get a digital copy of your DVDs in a very short time. Besides, there is a built-in player for you to preview completely.
100% Secure
100% Secure
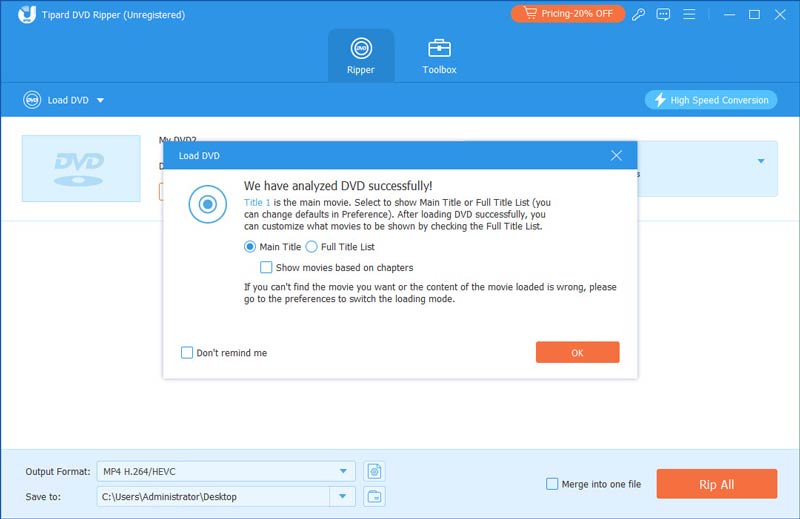
Step 1Launch the Software and Insert the DVD
When you download DVD Ripper from its official site, launch the software and insert your DVD. DVD Ripper will automatically load your disc. When it’s successful, choose a title according to your requirements.
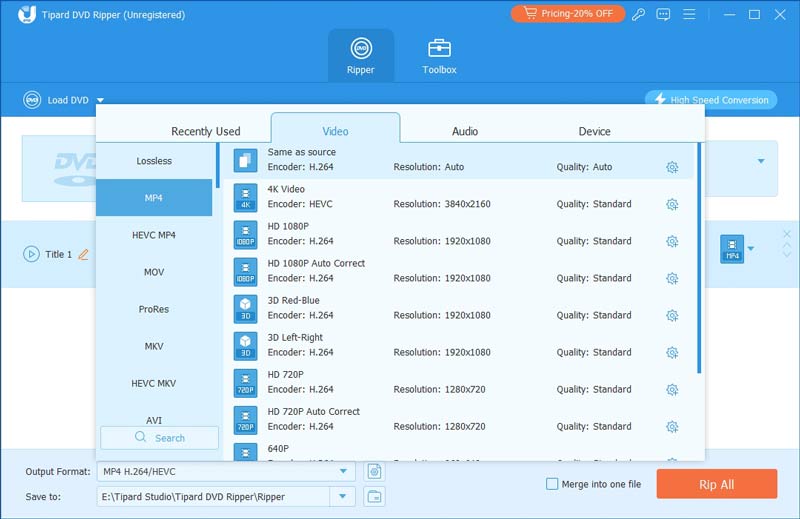
Step 2Select Output Format
In the bottom bar, there are two menus in the left-hand corner. The above one is named Output Format. Tap it, and you will see a pop-up interface where you can choose an output format for your resulting file. Besides the video and audio formats, you can also customize formats with device features.
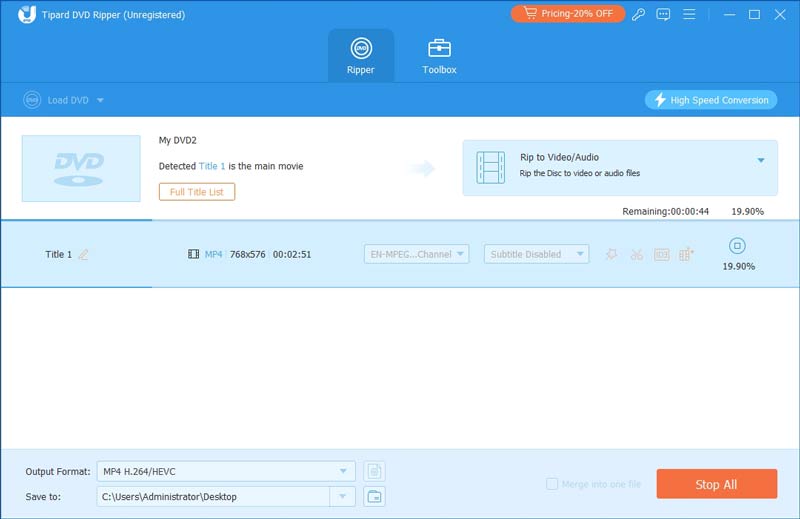
Step 3Select Final Destination
The other menu in the left-hand corner is Save To. You can click it to find an output destination for your resulting file.
Step 4Start Ripping
When all settings are done, click Rip All in the right-hand corner. You can stop it any moment you want. When it finishes, you can enjoy your video right now on the computer.
Part 4. FAQs about HandBrake
-
Can HandBrake do multiple files at once?
Yes, users can set up multiple encodes at once by adding them to HandBrake’s Queue.
-
What is the limit of HandBrake?
HandBrake is excellent at reducing the video file size without lowering its quality. This will do well to get your files uploaded faster and ensure your videos are within the 2GB limit. Also, it won’t require any setup to get your video file size down to a smaller size.
-
Can I rip subtitles to a DVD with HandBrake?
After the ripping setting is finished, you can click Subtitles and choose Under Track. Select your language from a pop-up menu if the subtitle is available. But if the DVD has subtitles itself, you can have HandBrake add it to ripping.
Conclusion
In today’s passage, we introduced the clear steps about how to use HandBrake to rip DVD. HandBrake is a great cross-platform program for users to rip, manage, and collect their DVDs. But, HandBrake also has a severe problem: it does not copy entire DVDs sometimes. That makes HandBrake unstable to use. So Blu-ray Software has found you a more efficient one, the DVD Ripper. If you want to experience more about it, you can click the buttons down here and have a try.
100% Secure
100% Secure
